Monday, February 3, 2014

*Mini Album in a Box*

In case you hadn't noticed, I'm in mini album mode right now. ;)
 I was looking around online at mini albums and came across this mini album in a box.....as soon as I saw it I wanted to give it a try, so I went ahead and purchased the tutorial and got to work.  My first one didn't turn out so good, I made the top 1/8" too small and it wouldn't fit properly.  The instructions mention that the measurements are very precise and need to be right on in order to work properly, so I tried again and this time.... voila!  It worked out fine & here it is.  Hope you like it.

The box measures 7" x 5"  
 The papers are Recollections *Cherry Blossoms* from Michaels.  They are beautiful and didn't want to cover it, so I just added the words, cut out on my Cricut with the *Sophisticated* cartridge.


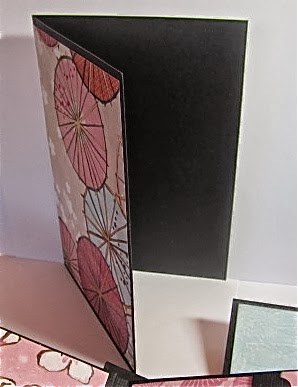
The lid lifts off & the sides collapse to reveal the pages.  Each of the 8 pages is a pocket which holds an insert.


inside of lid

 insert with a belly band


all the inserts open up like a card... lots of room for pictures


this insert has a flap on the front and 2 pockets with tags


flip up page

Glad you took the time to visit today,  If you are interested in making one of these albums here is the link to the etsy store where you can purchase the tutorial.  It comes with a very detailed pdf and an equally detailed video tutorial.
 I'm going to be starting another of these albums, so stay tuned & I'll be back soon to show you.


Thursday, January 30, 2014

*Elegant Edges* Mini Album

Hello there,
I'm back today to show you an album that I just finished.  The shape is cut from the Cricut *Elegant Edges* cartridge.  This cartridge has a *book* feature and has many shapes to choose from, it also has frames, borders & more to go with them.


Here's the paper stack I used


Page 1 & 2
The inside cover page has a pocket and a photo matt.  The pocket is only glued down at the bottom so that you can slide in a bigger photo if you wish.

Page 3 & 4
The left page has a waterfall style insert, each one has a pocket on the left side and slide in photo matts, as you can see in the next picture


Page 5 & 6

Page 7 & 8
Right page has a picture frame, the top is open to slide your picture in.

Page 9
There is room on the back of this flower to add a picture

Page 10
There's an insert on this page with 2 front pockets & tags and a side pocket with a photo matt. 


The back of the insert is also a photo matt.

Page 11 & 12

Page 13 & 14

Page 15 & 16
Another frame and tag

Page 17 & 18
This page has a pocket, again glued just at the bottom, and a tag.

Back of the album


This *hidden hinge* binding system created by Kathy Orta is my favourite one to use for albums.  Here is a link to Kathy's video instructions.

Thanks for stopping by, hope you have a great day!


Thursday, January 23, 2014

Happy Anniversary!


I've been busy in my craft room again and I'm back to show you a card that I made for my daughter & son-in-law's wedding anniversary.


That's all for now,  thanks for looking & have a lovely day!


Saturday, January 18, 2014

Pamper Yourself!

Here's another card I made for my Granddaughter for her personal bridal shower.


I purchased this image from *MyScrapChick.com*, printed all the separate pieces, coloured them and then put it all together.  I gave the towel texture by embossing with my Cuttlebug and a Sizzix Alterations folder.  The black border is a Martha Stewart *punch around the page* set, sorry I don't know the name of it.  


The wedding is only a week away now, excitement! excitement!

Thanks for stopping by on your journey around the world wide web today!


Monday, January 13, 2014

*Garden Tea Party* Mini


My latest *crafty* project is this mini album made with the DCWV *Garden Tea Party* paper collection. There are lots of tags and *tea* related sayings included in this collection, so there's tons of room for pictures.

I tried a new binding technique on this one, (new to me anyhow) called *stacked hinge binding*

I found an excellent, detailed tutorial for this album on Youtube, courtesy of *Papercrafter 45*.  There you'll find instructions for this 6.5" x 6.75" album from start to finish, including the stacked hinge.

Now for some pictures, there's lots to see...

 Front cover

Here's some of the pages...

The inside front cover

Some of the right hand pages have flip outs, as you can see in the next pictures

flips to the right

flips up

This page has a corner pocket

Some left hand pages have side pockets

 Some pages have pockets across the bottom

Some of the left hand pages flip out to the left as seen below


Inside back cover

The back

I didn't include all the pages here.  I'm very pleased with how this album turned out & will definitely make another one.
 My next project is another mini album using my Cricut *Elegant Edges* cartridge.  The cartridge has a *books* feature, with many designs to choose from.

Thanks for visiting my blog today & come back soon!


Related Posts Plugin for WordPress, Blogger...