Thursday, December 22, 2011

*Roses & Ruffles*

I saw a lovely card on Clare's Creations blog where she did the paper ruffles, she has a tutorial too.  This is my version.  I still need lots of practice on the ruffles.

A closer view.
I added a paper bow edged with distress ink.
Check here for my tutorial on how to make the bow.

Thanks for visiting today, I hope you'll come back soon.


Wednesday, December 21, 2011

WOYWW


It's not too messy today - it was earlier, but I tidied up before I started on the ruffle card. I can't start something new when there's stuff all over the place.

See my new pink ATG gun?  Well, you can't really miss it, can you?  I had seen them on videos etc., but thought because of their size they would be pretty awkward to use.  I was wrong, they are great to use. I love it!  Something else that I really like is the Tombow glue in the little green & white container. Boy, does that stuff stick!  The card I'm working on now is a ruffle card.  I'm waiting for the last ruffle to dry before I can finish it.

That's all for now friends, I should go and start on supper, then I can watch Corrie Street.  Anybody out there who's a Corrie fan?  It's really exciting right now, don't want to miss it.

Have a super day...
 

Saturday, December 17, 2011

*Tissue Time 2*


Still on the subject of  colds & flu,  here's a cute idea that I found  on this Youtube video

Just the right size to hold a personal size pkg. of tissues, it would make a perfect little gift for someone who's feeling under the weather.

A close-up the cute snowman.
(from a set of pre-coloured digi images available from D.A.I.S.I.E. Company)
  
A pink one


The flower was cut out with my Cricut *Sophisticated* cartridge.
I then added glue to the edges and sprinkled clear microbeads on.  In real life they shine, very pretty.  I popped them up on foam pads and added a pink pearl.

That's all for now, hope you'll have a look around before you go, there's lots to see.

Till next time.....


Wednesday, December 14, 2011

*Tissue Time*


Judging by the number of people around here that are sick with colds and the 'flu, (including me) it certainly is *tissue time*.
I saw a similar card when I was blog hopping & thought, *what a cute idea* plus I had the perfect sentiment (TLC) saved on my computer. Sorry, can't remember where the *get well soon*  sentiment came from.
It is a very easy & quick card to make.   

The inside.

Challenges
Allsorts challenge *It Takes Two*
Corrosive Challenges  *Anything but Christmas*
Totally Papercrafts  *Anything but Christmas*

Thanks for popping by my blog.


Monday, December 12, 2011

*Snow Fun*


Here's my winter version of an easel/step card.
The girl & snowman are from *Fred She Said*, the snowboarder boy is from *Sliekje's* digital stamps.  The trees, snow scene, snowflakes & sign are free downloads found on the internet and the sentiments are from either Gingers or TLC (links on the right) I used my Copics to colour the images.


Thanks for stopping by today & hope you enjoy checking out my other posts....there's lots to see.
Bye for now....


Sunday, December 11, 2011

Congratulations!


 I made this wedding card for friends who were married yesterday.  
I know I said I was going to make a winter scene card, but I suddenly remembered that I had a wedding card to make, so will do the winter one next.
This design is not my own idea, I saw it on Splitcoast, and the lady had a link to the original.  You should check out her blog, she does absolutely beautiful work.
The front is layered with white & gold card stock, top layer embossed with Cuttleug *Divine Swirl*.  Butterfly & leaves are M.S. punches.  The flowers & little swirly thingies in the flowers are from my Cricut *Sophisticated* cartridge.  I inked the flower edges with lavender ink, burnished, layered and finished off with a tiny pearl.  The sentiment is one I have saved on my computer & layered with purple & gold c/s.... hard to see on the picture.

The inside

The swirls are from my Cricut *Sophisticated* cartridge.  Flowers & leaves on the left side are punched out.  Butterflies are M.S. punches.  The pocket on the right holds a tag where I wrote my message.  Sorry but I can't remember where any of the sentiments came from, if you recognize them as your own, please let me know so that I can give you credit.


I have entered this card at Bunny Zoe's (thanks for reminder Dorcas) and *Make it Monday* link is on the right.

Thanks for visiting today, I appreciate it.
Have a lovely day!


Sunday, December 4, 2011

*Homey* Scene Step/Easel Card


I first saw this style of card on DJ's blog The short video directions can be found here.  It folds down to fit in an envelope... first the piece with the books and teddy folds down over the front piece.  Then the girl and chair next.  Then the fireplace folds down and becomes the front of the card.

I love to do scene cards and step cards make an ideal base for this. 
This card is a combination of a  step and easel card.  I found the fireplace digi image on Cuddly Buddly.  You can find the link on my sidebar.  All the other digi's are ones I've had for ages and don't remember where I found them.
I used my Copics markers to colour except for the books, they were already coloured.  The grey carpet is a digi background image. I have entered this card at Make it Monday...the link is on the right.


Here are some more scene cards that I have made.
*Home Sweet Home*   *Snowflakes*   *Beach*   *Cabin in the Woods*   *Garden*   *Sunflowers*  

Thanks for stopping by today.  I'll be working on a winter scene card next, so stay tuned.


Monday, November 28, 2011

Lattice Card


Have I ever told you how much I love Valita's Designs blog?  
She has so many neat ideas & lots of tutorials.  Here's the Tutorial for this card and more.
This is one of her card designs using Nesties. This is the first one of these cards that I've made and there are things about it that I don't like... the inking on the cutouts for one, I think it would look better with a lighter, more delicate colour. Also the embossing on the right side.  That was an afterthought and I thought it would look nice with a few vines etc. just on one side.  Well, it doesn't.  I should have done the whole thing before I added the cutouts etc. 
Oh well, I'll know for next time.

 Here is a closer view...


The flowers are Prima and I punched the leaves out with my M.S. punch then inked the edges.

Here's the inside.  
So that I don't cover up the green that shows through at the front I will write my message on the back.

Now on a different note....
Yesterday we had one heck of a strong chinook wind here in Alberta. I heard on the radio this morning that it did lots of damage.  Well I believe it because look what it did here in my backyard....


Fortunately this is not a vehicle that we use, in fact, we have been trying to sell it.  We thought that idea was now toast, but then our neighbour came over and made us an offer.  Plus, my hubby now has more firewood stacked up for his shop, so it's not all bad.

Have a lovely day everyone!  


Thursday, November 24, 2011

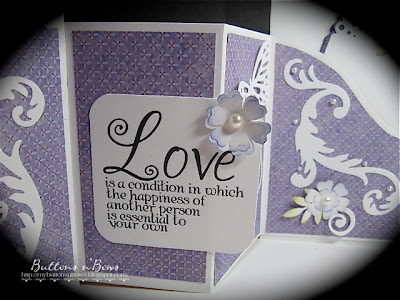
Silver Wedding


Our friends celebrated their 25th anniversary recently.
I decided to do a tri fold shutter card for them. I used a silver & white paper for most of it, plus white card stock embossed with my swiss dots folder.  *Always & Forever* and *25* are cut out with my new Cricut cartridge *Sophisticated*.  
I wrote my message on the back.


The bling is from Michael's and the butterfly is a Martha Stewart punch. The little swirl design on the black is an EK Success border punch...just one end of it.
I added this card to *Make it Monday*

Here's a video tutorial if you'd like to give it a try.

That's all for now folks,


Sunday, November 20, 2011

My Very First Mini

......so don't look too close! lol

This is a coffee filter album.  Each filter has a pocket for your recipe cards.  The filter is used as a pattern to cut out your backgrounds.  (be sure to use each individual filter as your pattern because the filters are not all exactly the same size) 
I made this before I got into colouring so I used digi images (coloured) that I purchased from Trina Clark Designs.  Her prices are very reasonable, and if you like *country* you'll love what she does.


Thanks for popping by, have a lovely day and keep warm!  If you are also in Alberta, you'll know exactly what I mean. Brrrrrr!

P.S.  I just realized that I had a tutorial saved on my computer, so here it is....better late than never!

See you soon,

Related Posts Plugin for WordPress, Blogger...